

Crafting homemade cards can spark joy like nothing else. Each card you create carries a piece of your heart, making it a special gift for your loved ones. This post is designed to inspire you with cute homemade card ideas that are not only fun to make but also offer a sweet, personal touch for any occasion. Whether it’s a birthday, anniversary, or just a simple “thinking of you,” handmade greeting cards can make your message stand out.
If you’re someone who loves DIY projects, this guide is perfect for you. It’s filled with creative card-making tips that cater to all skill levels, whether you’re a seasoned crafter or just getting started. You will find that these ideas are charming, unique, and oh-so-personal, giving your special messages an extra layer of love. I’ve gathered 12 card designs that will not only inspire your creativity but also help you connect with those who matter most.
Get ready to dive into delightful DIY card designs! Each idea is easy to follow, so you can create cards that reflect your personality and the sentiments you wish to share. You’ll discover fun techniques and materials that will elevate your card-making game. Let’s jump into these adorable card ideas and bring a smile to someone’s face!
Key Takeaways
– You’ll find 12 cute homemade card ideas that are perfect for various occasions, ensuring your messages are heartfelt and special.
– Each card project includes easy-to-follow instructions and materials, making card-making accessible for all skill levels.
– Learn about different techniques, from pop-up designs to watercolor styles, that can add a creative flair to your handmade greeting cards.
– Discover how to personalize your cards, making them unique gifts that your friends and family will cherish.
– Explore the joy and satisfaction of crafting, turning simple materials into beautiful keepsakes that show you care.
1. Pop-Up Surprise Card

Imagine the joy on your loved one’s face when they open a card to discover a delightful pop-up surprise! These cards add an extra layer of excitement and creativity, making your message unforgettable. With just a few folds and cuts, you can transform a simple card into a memorable gift that stands out. Think about colorful designs like flowers or cake slices that spring to life as they unfold.
Start by selecting a theme that speaks to the recipient’s interests. Use vibrant patterned paper for added flair and experiment with various pop-up shapes and sizes to personalize your creation. This craft is not only enjoyable but also allows you to express your heartfelt sentiments.
Key steps to create your pop-up card:
– Fold cardstock in half for the card base.
– Cut slits along the fold for the pop-up feature.
– Push the cut section inward to create a tab.
– Decorate the tab with drawings or cut-outs.
– Add a personal message around the pop-up.
This charming project takes about 30 minutes and leaves a lasting impression, perfect for any occasion!
Cute homemade card ideas win hearts fast. A pop-up surprise turns a simple note into a memory — just a few folds, a colorfully themed element, and a smile you can cradle in the card.
Pop-Up Surprise Card
Editor’s Choice


2. Watercolor Wonder Card

Who can resist the enchanting look of watercolor art? This technique brings a beautiful, artistic touch to your cards, making each one uniquely special. With soft colors and flowing strokes, you can convey emotions effortlessly. Just grab your watercolor paints and let your creativity flow, whether creating delicate backgrounds or simple floral designs.
To get started, ensure you have the right materials and don’t be afraid to mix colors for stunning effects. Allow each layer to dry before adding more, giving your card depth and personality. This method is adaptable for any occasion, making it a go-to choice for heartfelt greetings.
Essential items for your watercolor card:
– Watercolor paper for a sturdy base.
– Watercolor paints for vibrant colors.
– Clean water for mixing and rinsing.
– A palette for easy paint access.
This simple yet impactful technique guarantees beautiful results that will make anyone’s day brighter!


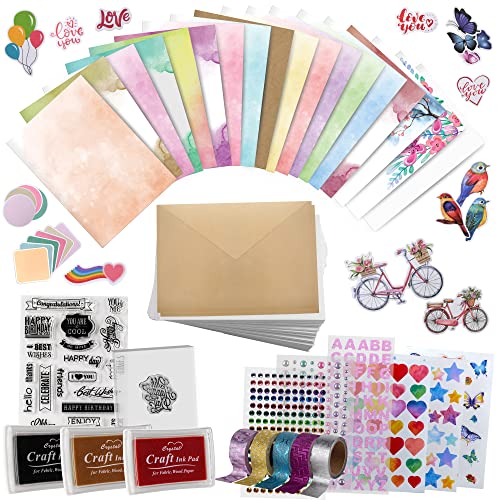
3. Stamped Greetings Card

Transform your cards with the charm of stamping! A few thoughtfully chosen stamps can add texture and dimension, turning an ordinary card into something truly special. Whether you opt for seasonal themes or unique designs, stamping offers endless possibilities for creativity.
Start by gathering a variety of colors and stamps to create a visually stunning piece. Layer different stamps for added depth and interest. This method is straightforward and allows for personal expression, making it easy to create cards for any occasion.
Here’s how to craft your stamped card:
– Select your cardstock and fold to desired size.
– Choose your stamp and apply ink evenly.
– Press firmly onto the card for a crisp print.
– Repeat with additional stamps and colors.
– Finish with a personalized note.
With a little practice, you’ll create beautifully stamped cards that showcase your unique style!
📹 Related Video: How to Make Beautiful Simple Stamped Greeting Cards


4. Interactive Scratch-Off Card

Surprise and delight with an interactive scratch-off card! This fun design keeps your recipient guessing until they uncover the hidden message. Using scratch-off paint or stickers, you can create an engaging experience that adds excitement to your card.
Begin by writing a special message and cover it with scratch-off material. Decorate the card front to match your theme, and don’t forget to include instructions for scratching off the message. This card is perfect for contests, party invitations, or simply to inject some fun into a greeting.
Materials needed for your scratch-off card:
– Cardstock for a sturdy base.
– Scratch-off stickers or paint for the surprise element.
– A coin or wooden stick for scratching.
This creative card design is sure to bring smiles and add an element of surprise to any occasion!
Did you know that 62% of recipients remember a message longer when it’s hidden behind a scratch-off reveal? With cute homemade card ideas like this interactive scratch-off, you turn every surprise into a share-worthy moment.
Interactive Scratch-Off Card
Editor’s Choice


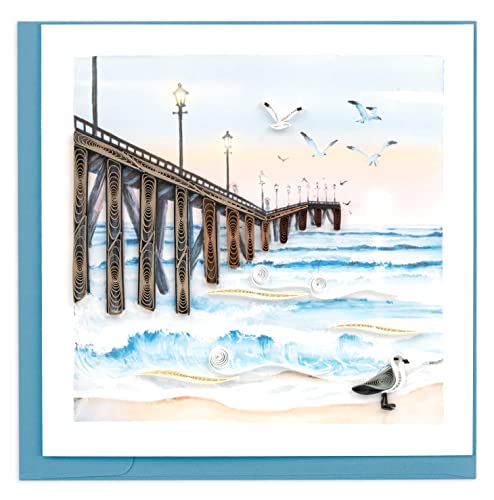
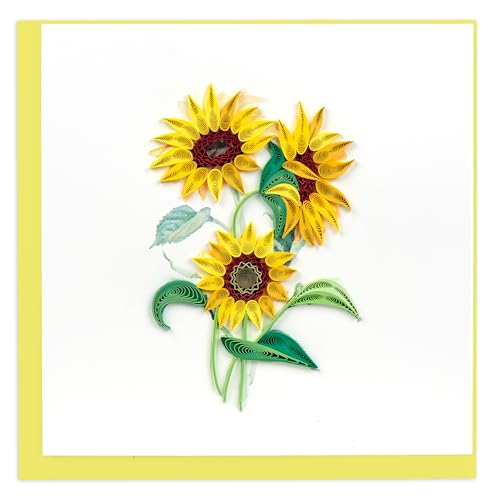
5. Quilled Card Creations

Discover the art of quilling, where you roll and shape strips of paper into stunning designs! This technique adds a three-dimensional aspect to your cards, creating an elegant and intricate look. By forming various shapes like loops and swirls, you can craft beautiful flowers or abstract art that captivates.
Gather your materials and begin to experiment with different shapes and arrangements. Quilling allows for personal expression, as you can customize your designs and messages. This craft does require patience, but the end result is worth the effort!
Here’s how to create your quilled card:
– Cut quilling strips to your desired length.
– Use a quilling tool to shape the strips.
– Glue each shape onto the card base creatively.
– Write a heartfelt message once all elements are secure.
Your recipients will be amazed by the beauty of your quilled creations!

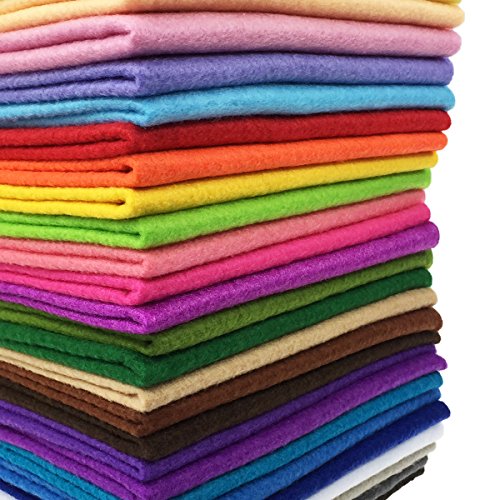
6. Fabric and Felt Card

For a unique tactile experience, consider using fabric or felt in your card designs. These materials add warmth and texture, making your card truly special. You can cut shapes, sew them onto the card, or create small pockets for surprise notes or gift cards.
Start by choosing colorful fabric or felt that fits your theme. Whether you glue or sew the elements, the personal touch will shine through. This method is perfect for heartfelt messages, baby showers, or weddings.
Essential materials for your fabric card:
– Cardstock for the base.
– Fabric or felt in your favorite colors.
– Scissors and glue for easy assembly.
– Needle and thread if sewing.
Your fabric cards will provide a cozy touch that everyone will appreciate!
Fabric and Felt Card
Editor’s Choice


7. 3D Collage Cards

Unleash your creativity with 3D collage cards! This style combines various textures and images, creating a stunning visual experience. Layering paper, fabric, or photographs lets you craft a unique card that captures attention. Plus, it’s a fantastic way to utilize scraps from previous projects!
Gather your materials and let your imagination run wild. The layering process allows for personal expression, making each card a reflection of your creativity. This method is perfect for special occasions or just to brighten someone’s day.
Key materials for your collage card:
– Various papers or magazines for diverse textures.
– Scissors and glue to assemble your pieces.
– Embellishments like stickers or ribbons for added flair.
Your collage cards will showcase your artistic side and bring joy to anyone who receives them!
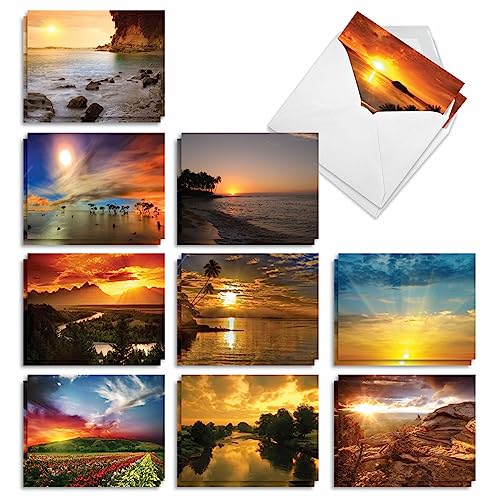
8. Nature-Inspired Cards

Bring the beauty of the outdoors into your card-making with nature-inspired designs! Incorporate dried flowers, leaves, or pressed plants to create stunning cards that capture the essence of nature. These cards work wonderfully for thank-you notes or heartfelt messages.
Start by selecting beautiful natural elements that resonate with your theme. Arranging these pieces thoughtfully will enhance the card’s beauty and meaning. A personal message will add warmth to your nature-inspired creation.
Materials required for your nature card:
– Dried flowers or leaves for decoration.
– Cardstock as a sturdy base.
– Glue and scissors for assembly.
These cards are a lovely way to share sentiments and connect with the natural world!
Nature-inspired cards turn simple messages into memories. Pressed leaves and dried flowers add texture, while a heartfelt note makes your cute homemade card ideas feel personal and warm—practical, beautiful, and perfect for thank-you moments.


How To Choose the Right Materials for Cute Homemade Card Ideas
When making cute homemade cards, choosing the right materials is essential. The right materials can elevate your handmade greeting cards, making them more appealing and personal. Here’s how to select the best items to create your DIY card designs.
1. Paper Type:
Start with the right paper. Cardstock is ideal for durability, while decorative papers add aesthetic appeal. Consider using textured, patterned, or colored paper to give your cards personality. A heavier weight paper will stand up to embellishments, making your cards more professional-looking.
2. Adhesives:
Next, pick your glue or adhesive. Liquid glue, glue sticks, or double-sided tape all work well for card-making. Choose a strong adhesive for heavier items like buttons or fabric. If you want repositionable options, consider using a tape runner. Always test the adhesive on a scrap piece first to ensure it doesn’t damage your materials.
3. Decorative Elements:
Think about what decorations you want to include. Stickers, stamps, and embellishments like ribbons or sequins can add flair. When selecting these items, keep your card’s theme in mind. For example, use floral stickers for a birthday card or winter-themed embellishments for holiday cards.
4. Tools:
Gather the right tools for the job. Scissors, craft knives, and cutting mats will help you make precise cuts. If you plan to create pop-up cards or intricate designs, a scoring board can help fold accurately. Having the right tools will streamline your crafting process and increase your card’s quality.
5. Color Scheme:
Consider the color palette for your cards. Choose colors that complement each other and fit the occasion. Soft pastels are great for baby cards, while bold colors can work for celebrations. Use a color wheel to find harmonious combinations. A well-thought-out color scheme can make your cards visually striking.
6. Personalization Options:
Finally, think about how you want to personalize your cards. Handwritten messages, custom illustrations, or photos can make your cards unique. Consider incorporating your recipient’s favorite colors or themes. Personalized touches show you care and make your cards stand out.
Pro Tip: Before starting your card-making project, lay out all your materials and tools. This way, you can visualize your design and ensure you have everything you need. Planning ahead can save you time and help avoid frustrations during the crafting process.
By following these steps, you can choose the best materials for your cute homemade card ideas. Not only will your handmade greeting cards look fantastic, but they will also carry a personal touch that your loved ones will cherish. Get creative and enjoy the process!


9. Layered Paper Cards

Add depth and dimension to your cards with layered paper techniques! Using different colors and patterns, you can craft visually striking cards that draw attention. This simple method enhances your design and allows for creativity in every layer.
Begin by selecting a variety of cardstock and cutting them into unique shapes. Layer these pieces creatively on your card for an eye-catching effect. This method is perfect for birthdays, holidays, or any cheerful occasion.
Materials you’ll need for layered cards:
– Various colored and patterned cardstock.
– Double-sided tape or adhesive for secure layering.
– Scissors for precise cuts.
Your layered paper cards will be a vibrant addition to any celebration!
Layered Paper Cards
Editor’s Choice


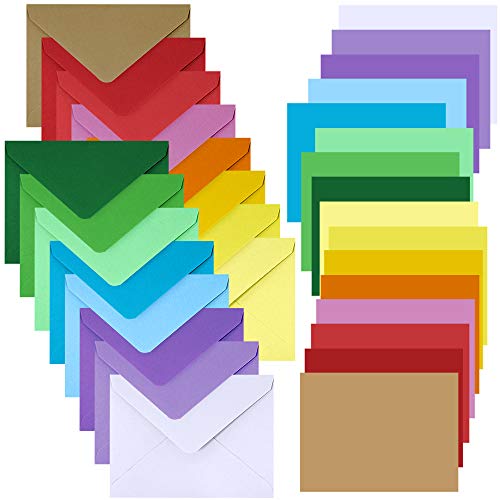
10. Envelope Surprise Cards

Add an exciting twist with envelope surprise cards! By attaching a small envelope to your card, you can include a gift card, note, or treat that enhances your greeting. This unique feature adds an element of surprise that recipients will love.
Start by creating your card and folding it to your desired size. Then, attach a small envelope to the card’s front or inside, ensuring it’s secure. Fill the envelope with a delightful surprise, and decorate it to match your card’s theme.
Essential materials for this card:
– Cardstock for the base.
– Small envelopes for the surprise element.
– Glue or double-sided tape for assembly.
This card is perfect for birthdays, holidays, or simply to show appreciation, making it a memorable gift!


11. Recycled Materials Card

Embrace sustainability by using recycled materials in your card-making! Old maps, newspapers, or wrapping paper can be transformed into unique designs while being kind to the planet. This creative approach not only adds character but also encourages eco-friendly crafting.
Gather your recyclable materials and cut or tear them into fun shapes. Assemble the pieces on your card base for a creative touch that showcases your personality. This method is perfect for any occasion, combining creativity with environmental consciousness.
Materials you’ll need for your recycled card:
– Recyclable materials like maps or newspapers.
– Glue and scissors for crafting.
– Card base for structure.
Your recycled cards will reflect your creativity and commitment to the environment!
Recycled Materials Card
Editor’s Choice


12. Minimalist Style Card

Sometimes, simplicity speaks volumes. Minimalist cards embrace clean lines and understated designs, allowing your message to shine through. A few carefully placed elements can convey powerful sentiments, making this style ideal for those who appreciate elegance.
Begin by choosing a simple color palette and creating a striking focal point, such as a single flower or geometric shape. Pair this with a meaningful message in a simple font for maximum impact. This timeless style is perfect for various occasions, from birthdays to thank you notes.
Materials needed for your minimalist card:
– High-quality cardstock for a polished look.
– A few decorative elements for added interest.
These cards are a beautiful way to express your thoughts while maintaining a sophisticated aesthetic!

Conclusion

Creating handmade cards is a heartfelt way to express your love and gratitude. With these twelve cute homemade card ideas, you’ll find endless inspiration for your next crafting session. Dive into your materials, unleash your creativity, and enjoy the process of making something special for someone you care about.
Your handmade cards will not only convey your thoughts but also reflect the love and effort you put into creating them!
Note: We aim to provide accurate product links, but some may occasionally expire or become unavailable. If this happens, please search directly on Amazon for the product or a suitable alternative.
This post contains Amazon affiliate links, meaning we may earn a small commission if you purchase through our links, at no extra cost to you.
Frequently Asked Questions
What are some cute homemade card ideas I can try today?
Here are a few cute homemade card ideas you can start with tonight: a pop-up heart card, a layered paper collage, a simple washi tape mosaic, a pressed flower card, and a hand-lettered sentiment with a subtle border.
To make a pop-up heart: cut two small hearts from colored cardstock, glue them on the inside so they pop when opened, and finish with a ribbon or doodled border. For a collage: sort scraps by color, layer shapes on a blank card, glue down, and add a short handwritten message. For a washi tape mosaic: cover the front with diagonal strips in a cohesive colorway, then write a mini message with a fine-tip pen. For a pressed flower card: press small flowers ahead of time, arrange them on the card, and seal with clear-drying glue. For a hand-lettered sentiment: sketch lightly in pencil, then go over with a brush pen and add tiny doodles along the edges. These DIY card designs are easy to customize into personalized card ideas for any occasion.
How can I personalize handmade greeting cards for different occasions?
Personalizing handmade greeting cards starts with the recipient and the occasion in mind. Start with a color palette that suits the event and the person’s taste.
Include a personal touch like the recipient’s name, initials, or a photo element where appropriate. Add a short, heartfelt message tailored to the moment (birthday, anniversary, thank you, encouragement). Consider motifs that reflect the occasion (balloons for birthdays, florals for anniversaries, stars for achievements) to make each card feel personalized card ideas rather than generic.
What supplies do I need for DIY card designs on a budget?
You can create charming handmade greeting cards without breaking the bank. Essentials include sturdy cardstock, scissors, glue or double-sided tape, and a selection of colored pens or markers. A basic scoring or bone folder helps you get neat folds, while a few embellishments (stamps, ink pads, washi tape, and a small stash of stickers) go a long way.
Budget tips: use scrap paper for collages, repurpose old magazines for color accents, and shop for seasonal discounts on basic supplies. With a little creativity, you’ll have a pile of beautiful DIY card designs without overspending.
What are some tips to make creative card making projects look polished?
Polished-looking cards come from planning and simple techniques. Start with a clean layout or template, limit your color palette to 2–3 cohesive tones, and use a grid to align elements neatly.
Texture helps—layer elements with foam tape for dimension, add minimal embossing or a subtle foil accent, and keep edges clean with precise scissors. Practice on scrap before applying to the final card, and sign your name or add a small signature touch to make each card feel personalized card ideas you crafted yourself.
How can I pair a cute card with a meaningful gift?
Pairing a cute card with a gift elevates the whole present. Choose a personalized card ideas design that mirrors the gift’s vibe, whether playful, elegant, or cozy.
Consider adding a small handmade tag or a tiny craft project for the gift presentation, like a coordinating bookmark, tag, or mini envelope with a note. Pack the card with the gift in a coordinated envelope or wrap to create a thoughtful gifting experience and emphasize the connection between the craft projects for gifts and the handmade greeting card.
Related Topics
cute homemade cards
handmade greeting cards
DIY card designs
personalized card ideas
creative card making
seasonal crafts
easy card projects
gift ideas
beginner friendly
crafting techniques
card making tips
unique stationery